How to Publish a Website Beyond No-Code Limitations

So, you've validated your no-code MVP and it's getting real traction. First off, congratulations—that’s a huge win. You've proven your concept has legs. But now you’re hitting a wall. Publishing a website is no longer about hitting a button in Bubble or Webflow; it's about strategically rebuilding your validated idea into a scalable, production-grade asset.
This is the moment you move beyond the training wheels. You're shifting to a custom tech stack, taking full ownership of your intellectual property, and setting your startup up for serious, long-term growth.
From No-Code MVP to Scalable Asset

That initial success is a massive milestone. But if you’re like most founders at this stage, you're starting to feel the friction. The very tools that got you here are now holding you back. This isn't just about launching another site; it’s a critical strategic pivot from building a project to building a business.
The limitations of no-code platforms tend to show up right when things start getting exciting.
Recognizing the Scaling Pains
Does this sound familiar? You're spending a small fortune on Zapier just to string together essential services. Your automations feel like a house of cards, threatening to collapse under the slightest increase in user load.
These are classic signs that your MVP has outgrown its foundation. Performance bottlenecks, rigid customization options, and the nagging reality that you don't truly own your IP—these issues can kill your momentum and make your startup far less attractive to investors.
Your no-code MVP was built to test a hypothesis. Your production-grade website is built to capture a market. The transition between the two is where a project becomes a company.
This guide will reframe what "publishing" means for you. Forget clicking a "Go Live" button. We’re talking about a deliberate migration from a fragile prototype to a robust, scalable web application that you actually own. It’s your roadmap for breaking free from no-code constraints to build something secure, reliable, and truly powerful.
The Competitive Landscape Demands More
Getting a website live is easier than ever, but standing out is brutally difficult. We're talking about a digital space with over 600 million blogs and 7.5 million new posts published daily. A basic no-code site just gets lost in the noise.
For a startup chasing high growth, a production-ready application is non-negotiable. The data is clear: businesses that invest in their online presence see twice as much email traffic, and marketers who prioritize it are 13 times more likely to report a positive ROI.
Founders who hit the scaling walls of Webflow often learn this the hard way—their brittle automations fail spectacularly during a viral traffic spike. This is precisely when moving to a scalable stack like Next.js with a PostgreSQL backend becomes a necessity, not a luxury.
No-code is fantastic for getting to market fast. But when you're preparing for VC funding and need complete ownership of your IP, it's time to graduate. This is where experts like First Radicle come in, transforming fragile projects into robust software in just six weeks. To dig deeper into what’s happening in the space, you can explore the latest publishing industry trends.
Mapping Your Migration to a Scalable Tech Stack
Moving from a no-code platform to a custom tech stack is a massive leap forward. But before a single line of code gets written, you need a solid game plan. This isn't just about avoiding a few headaches; it's about creating a strategic roadmap that prevents costly do-overs and ensures your new, more powerful site actually meets your business goals.
The very first step is a brutally honest audit of what you already have. Look at your Bubble app or Webflow site and figure out what’s working well. More importantly, where are the cracks showing? Pinpoint the janky automations held together with Zapier and sheer willpower, and identify the performance bottlenecks that are frustrating your users. This audit gives you a clear, unvarnished baseline.
From No-Code Databases to PostgreSQL
One of the gnarliest parts of any migration is the data. No-code tools often use proprietary or simplified databases, like what you find in Bubble or Airtable, that don't map cleanly to a robust system like PostgreSQL. The real work here is translating your existing schema—all your tables, fields, and the relationships between them—into a new, scalable database structure.
This process breaks down into a few key tasks:
- Identify Your Core Data Models: What are the fundamental pieces of your business? Think
Users,Products,Orders, orProjects. - Define the Relationships: How do these pieces connect? A
Userhas manyOrders, and eachOrdercontains multipleProducts. Get these connections documented. - Nail Down the Data Types: You need to be specific about what kind of data each field holds (e.g., text, integer, boolean, timestamp). Getting this right from the start is absolutely crucial for data integrity down the road.
This database map is the blueprint for your entire backend. If you get this right, you're not just rebuilding—you're upgrading.
Prioritizing Features for Your First Coded Version
Here’s a hard truth: you can't—and shouldn't—rebuild every single feature from your no-code app all at once. The next step requires some ruthless prioritization. Start by documenting your core user flows, like your sign-up process, the checkout experience, or how a user creates a new project. Which of these are absolute, day-one dealbreakers for the business to function?
Your goal is to define the minimum viable product (MVP) for your new coded application. A classic mistake is getting bogged down trying to replicate every bell and whistle from the old system. Instead, focus on the 20% of features that deliver 80% of the value. This gets a stable, valuable product into users' hands faster, so you can start iterating based on real feedback. Analyzing which features get the most use in your current setup can offer incredible insights. For those looking to deconstruct what makes successful apps tick, it's often helpful to learn more about how to clone websites to understand their UI/UX patterns.
The point of a migration isn't to perfectly copy your old system. It's to build a stronger foundation for the future, shedding the technical debt and limitations that were holding you back.
Migrating off a no-code platform is often a direct response to hitting a ceiling. You need more performance, better security, or the ability to build custom features that your no-code tool just can't handle.
Here’s a quick look at how a production-grade stack solves these common growing pains:
No-Code Limitation vs. Production-Grade Solution
| No-Code Challenge | Production-Grade Stack Solution (e.g., Next.js/Python/PostgreSQL) | Why This Matters for Your Startup |
|---|---|---|
| Scalability Bottlenecks | Horizontally scalable architecture; efficient database queries with indexing. | Your app won't crash during a traffic spike from a marketing campaign or big press feature. |
| Limited Customization | Full control over UI/UX and backend logic. Build any feature you can imagine. | You can create a unique user experience that becomes your competitive advantage. |
| "Vendor Lock-in" | You own the code and the data. You can host anywhere and switch providers freely. | Gives you full autonomy over your business and technology, reducing long-term risk. |
| Opaque Performance | Granular monitoring of server response times, database loads, and API calls. | You can pinpoint and fix performance issues quickly, improving user retention. |
| Data Structure Rigidity | Flexible, relational database schema (e.g., PostgreSQL) that can evolve with your needs. | Your data model can grow with your business without requiring a painful overhaul. |
| Security Concerns | Implement custom security protocols, fine-grained access controls, and advanced threat detection. | Protects sensitive user data, builds trust, and helps you meet compliance standards. |
Ultimately, this move is about taking back control. You're trading the initial convenience of no-code for the long-term power and flexibility of a custom solution.
Choosing the Right Technology Stack
Once you have a clear feature set and database schema, you're ready to pick your tech stack. This decision should be driven by what your product actually needs, not just what’s trendy on Hacker News. For most web apps graduating from no-code, a stack like React/Next.js for the frontend, paired with a Python or Node.js backend and PostgreSQL, is a fantastic, battle-tested choice.
When making your decision, think about:
- Performance Needs: Is your app a real-time dashboard or does it need to handle huge media uploads? Your stack needs to match the workload.
- Developer Availability: How easy will it be to hire developers who are skilled in these technologies?
- Ecosystem and Community: A robust community means better libraries, more tutorials, and faster answers when you get stuck.
This careful planning phase is what turns a daunting migration into a series of manageable, strategic steps. With a solid plan in hand, you can finally start tackling the technical challenge of the data migration itself, moving your user accounts and transaction histories with confidence.
So you're ready to graduate from your no-code platform and launch a custom-coded website. This can feel like a huge leap, moving from a familiar, all-in-one tool to a whole new world of code and infrastructure. But don't worry—the core concepts are actually quite similar. You still need an address and a place to put your site; you just have more powerful tools to work with.
Let's walk through the essential mechanics of getting your coded website live, breaking down the jargon as we go.
Your Address: Domain and DNS
Every website starts with a unique address. This is your domain name—the yourbrand.com that people will type into their browsers. If you already own one from your no-code setup, you're ahead of the game. If not, you'll need to buy one from a registrar like Namecheap or Google Domains. Think of it as claiming your plot of land on the internet.
Once you have your domain, you need a way to connect it to your new website's actual location. That’s where the Domain Name System (DNS) comes in. It's essentially the internet's address book, translating your easy-to-remember domain name into a machine-friendly IP address.
You'll simply log into your domain registrar and update a few DNS records. This tells the internet, "Hey, when someone looks for yourbrand.com, don't send them to the old no-code platform anymore. Send them to this new place instead."
Your Home: Choosing a Hosting Environment
Next up is choosing where your website's files and code will live. This is your web hosting. For a coded application, the options look very different from the bundled hosting you got with Bubble or Webflow.
You’re generally looking at two main approaches:
Traditional Servers: This is the old-school way. You rent a dedicated computer (or a piece of one) that stays on 24/7, ready to serve up your site. It gives you total control but also means you're on the hook for managing security, updates, and scaling everything yourself. It’s a lot of overhead.
Modern Serverless Platforms: Services like Vercel and Netlify have completely changed the game for founders. With a serverless setup, you don't actually manage any servers. The platform handles everything—automatically scaling resources, deploying your site across a global network for lightning-fast speeds, and much more.
For any founder moving off a no-code tool, serverless is almost always the right answer. It gives you the performance and reliability you need to compete without burying you in server admin tasks. It frees you up to focus on what really matters: your product.
My Take: Choosing a modern host like Vercel isn't just a technical decision; it's a strategic one. You're aligning your infrastructure with the agility you need to build, test, and ship faster than the competition.
Your Engine: The Build and Deployment Pipeline
This is where you really see the power of a coded stack. Instead of clicking a "publish" button in a visual editor and hoping for the best, you’ll set up an automated build and deployment pipeline. This process, often called CI/CD (Continuous Integration/Continuous Deployment), is the engine that powers modern software development.
It all starts with Git for version control and a platform like GitHub to store your code. Every change, new feature, or bug fix gets tracked in your private GitHub repository. This is non-negotiable for owning your IP, especially if you plan to pitch VCs. For a deep dive into this, check out our guide on how to publish a web page professionally.
When you connect your GitHub repository to a host like Vercel, the magic happens automatically:
- A developer pushes new code to GitHub.
- Vercel instantly detects the change and kicks off a build.
- It compiles your code into an optimized website and runs automated tests to spot any errors before they go live.
- If all tests pass, the new version is deployed across the globe in seconds.
This automated workflow is a game-changer for reliability. It virtually eliminates human error from manual uploads and gives you a safety net. If a bug ever does slip through, you can roll back to a previous, stable version with a single click.
With nearly 1.9 billion web pages online and digital-only subscriptions up 11%, the digital space is incredibly competitive. This kind of efficiency isn't just a nice-to-have; it's essential for survival and growth.
Before you even start deploying, though, a little planning goes a long way. Thinking through your migration first is key.
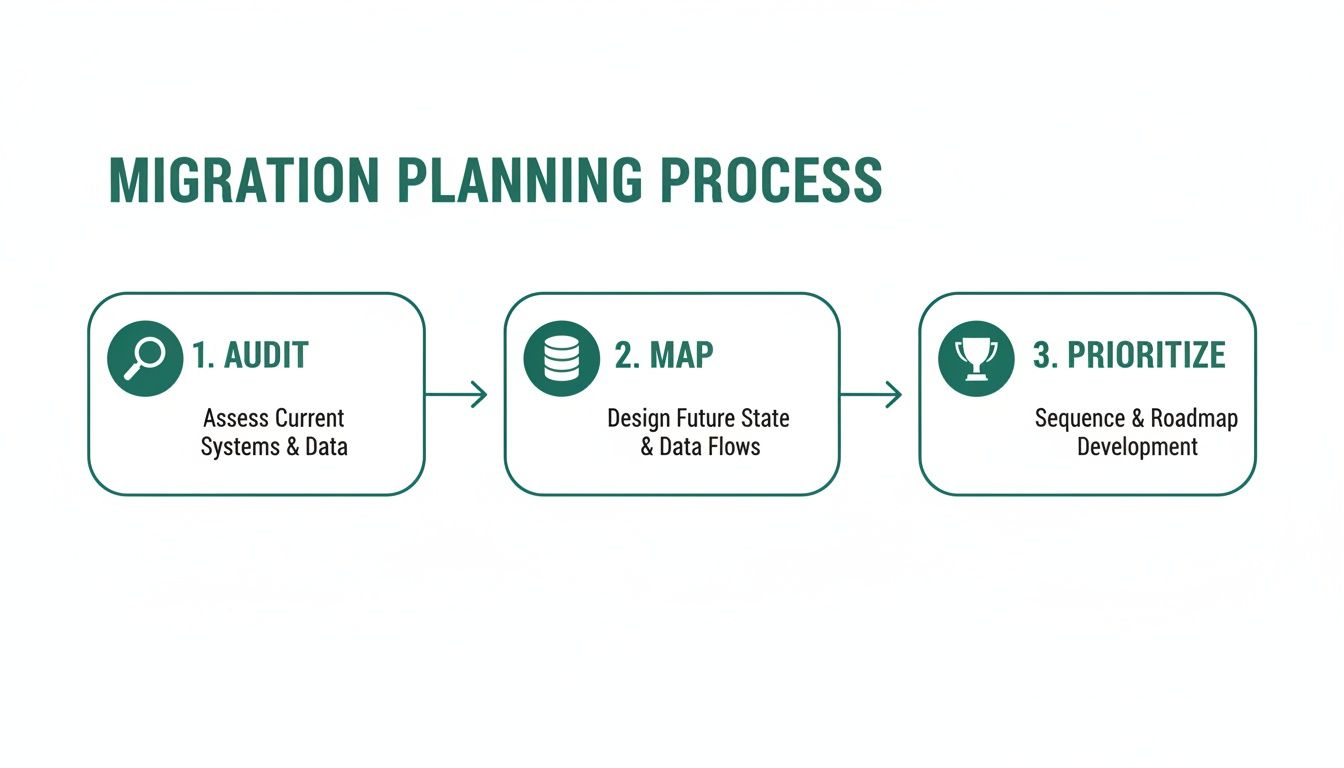
This simple process of auditing what you have, mapping it to the new system, and prioritizing what to move first ensures your technical execution aligns perfectly with your business goals from day one.
Securing and Optimizing Your New Production Environment

Getting your custom-coded website live is a huge milestone, but the work doesn't stop once you hit "publish." That’s actually just the starting line. Now, your focus needs to shift to making this new production environment secure, fast, and reliable—turning it from a working site into a professional-grade asset that's ready for real users.
This phase is all about building trust, creating a fantastic user experience, and making sure your site can handle traffic without a hiccup. Skipping these steps isn't really an option if you're serious about growth.
The Non-Negotiable SSL Certificate
First things first: you absolutely need an SSL/TLS certificate. This is what enables HTTPS, the secure protocol that encrypts the connection between a user's browser and your server. It’s the magic behind that little padlock icon you see in the address bar.
Without it, any information users submit—passwords, contact details, payment info—is sent in plain text, leaving it wide open for anyone to intercept. Modern browsers also actively flag non-HTTPS sites as "Not Secure," which is a surefire way to scare visitors away.
Put simply, HTTPS is a baseline requirement for user trust, SEO, and basic security. The good news is that most modern hosting platforms like Vercel provide and auto-renew SSL certificates for free, making the setup a breeze.
Moving Beyond No-Code Security
One of the big reasons founders move away from platforms like Bubble is to get full control over security. No-code tools offer a one-size-fits-all security model, but a real-world application needs a more deliberate, layered approach. This means you need to be thinking about security from the get-go.
Your focus should be on practical, high-impact measures. This includes:
- Securing Your APIs: Your backend APIs are the front door to your data. It's critical to implement proper authentication and authorization to control who can access or change what.
- Implementing Robust User Authentication: Go beyond a simple email and password. Look into multi-factor authentication (MFA) and secure session management to protect user accounts from being taken over.
- Adhering to OWASP Guidelines: The Open Web Application Security Project (OWASP) maintains an updated list of the top security risks. Building with these common vulnerabilities in mind helps you avoid rookie mistakes like injection attacks and broken access control.
A secure foundation isn't just a feature; it's a prerequisite for growth. By proactively addressing security, you're not just protecting data—you're building a brand that customers can trust.
If you’re ready to dive deeper into protecting your app, it’s worth getting familiar with these essential security best practices for web applications.
Optimizing for Global Speed and Performance
In a world of shrinking attention spans, speed isn't a luxury—it's a core feature. Slow load times frustrate users, torpedo your search rankings, and make your site feel broken. People will just leave and find a faster alternative.
Two of the most effective ways to boost performance are using a Content Delivery Network (CDN) and optimizing your images.
A Content Delivery Network (CDN) is a system of servers distributed around the world that store copies (or "caches") of your site's static files, like images, CSS, and JavaScript. When someone visits your site, the content is delivered from a server geographically close to them. This drastically cuts down on load times. If you're using a modern host like Vercel or Netlify, a CDN is usually built-in and enabled by default.
Image optimization is another easy win. Large, uncompressed images are one of the most common reasons for a slow website. Make sure you:
- Compress Images: Use tools to shrink the file size without a noticeable drop in visual quality.
- Use Modern Formats: Formats like WebP offer much better compression and quality than older formats like JPEG and PNG.
- Implement Lazy Loading: This clever technique only loads images when a user scrolls them into view, making the initial page load much faster.
The path to launching a website is changing, especially as the global immersive content market is projected to soar from $27.3 billion in 2025 to $206.3 billion by 2034. While no-code platforms help founders get started quickly, poor performance can sink a great product. Migrating to a modern stack with robust OWASP security and an efficient backend is what positions a startup for reliability, growth, and even future funding.
Your Post-Launch Playbook for Growth and Stability
Getting your site live isn't the finish line—far from it. It's really just the starting pistol for the next, more strategic race. Your new coded application is a serious asset, but like any asset, you have to manage it actively to see a return. This is where you switch gears from being a builder to being an operator, focusing on monitoring, iterating, and keeping things stable for the long haul.
Think of this as your playbook for what comes next. It’s all about setting up the right systems now so that when growth, user feedback, and the inevitable hiccups happen, you can handle them without losing momentum. Let's turn that live site into a resilient, scalable platform.
See What Your Users Are Actually Doing with Analytics
Your no-code MVP probably gave you a glimpse into your analytics, but a custom stack opens up a whole new world of insight. The first thing you need to do is get a proper analytics solution in place to see exactly how people are interacting with your new site. This data is the lifeblood of your product.
Without it, you're just guessing—making decisions based on a hunch instead of hard evidence. I'd recommend starting with these tools right away:
- User Behavior Analytics: Tools like Plausible or the classic Google Analytics show you what users are doing. You'll see which pages they visit, how long they stick around, and where they bail. This is gold for spotting popular features and finding points of friction.
- Performance Monitoring: Services like Sentry or Datadog are your early-warning system. They keep an eye on your app's health, flagging errors and performance bottlenecks in real-time. You'll often know there’s a problem before your users do.
- Heatmaps and Session Recordings: To understand the why behind the what, tools like Hotjar or PostHog are fantastic. They give you visual heatmaps and actual recordings of user sessions so you can see where people are getting stuck or confused.
Set these up the day you launch. This creates a baseline, so you can measure the impact of every single change you make from here on out. Your development process will shift from guesswork to a data-informed cycle of real improvement.
Create a System for Feedback and Iteration
Once real people start using your site, the feedback will start coming in. You'll get bug reports, feature requests, and everything in between. You absolutely need a clear, organized process to capture, prioritize, and act on all of it. A messy inbox or a random Slack channel simply won't work once you start to scale.
Set up a simple, straightforward system. It could be a dedicated email like support@yourbrand.com, a simple form on your site, or a project board in a tool like Linear or Trello.
The whole point is to create a single source of truth for all user feedback. This way, nothing gets lost. You can start spotting patterns, prioritizing the most critical bugs, and building your roadmap around what your users are actually asking for.
When you have a structured approach like this, user feedback transforms from noise into a massive strategic advantage. It keeps your team focused and, just as importantly, shows your users you're listening—which is huge for building loyalty.
The Importance of a Rollback Strategy
In a modern CI/CD pipeline, you're deploying changes quickly and often. But speed introduces risk; every now and then, a new release will break something. A rollback strategy is your safety net. It’s a one-click button that lets you instantly revert your application to the last stable version.
This capability is one of the biggest wins you get by moving to a host like Vercel. If a bad deployment brings down a critical feature, you don’t have a frantic, all-hands-on-deck fire drill. You just roll back. This gives your team breathing room to figure out what went wrong and fix it properly, all without your users being any the wiser.
This isn't just a cool tech feature; it's a core part of business continuity. It lets your team ship new things with confidence, knowing there's a reliable escape hatch if anything goes sideways.
Managing Costs as You Grow
As your traffic grows, so will your hosting bill. This is a big change from the fixed, predictable pricing of most no-code platforms. Cloud hosting costs are variable, which is great because you only pay for what you use, but it also means you have to actively manage it.
Keep a close eye on your hosting provider’s dashboard. Most platforms give you a pretty detailed breakdown of where your money is going. Be on the lookout for ways to optimize:
- Are your database instances bigger than they need to be?
- Could you optimize your images to cut down on bandwidth costs?
- Are there inefficient API calls racking up your serverless function bill?
Staying on top of your costs ensures your infrastructure scales efficiently as your user base grows. It prevents those nasty surprise bills at the end of the month and keeps your burn rate in check—something every founder and investor wants to see. This is how you make the final leap from a project to a defensible tech company, positioning you perfectly for whatever comes next.
Common Questions from Founders
Making the jump from a no-code platform to a custom-built website is a big deal. It’s a move that brings up a lot of questions. Here are the straight-up answers to the ones I hear most often from founders facing this exact challenge.
What's This Migration Really Going to Cost Me?
This is always the first question, and the honest answer is, "it depends." But I can give you a realistic ballpark. A typical migration will land somewhere between $15,000 and $75,000+. The final number really comes down to a few key things you'll need to map out.
The biggest cost drivers are always complexity and scope. If you're just moving a simple marketing site with a blog, you'll be on the lower end of that range. But if your no-code app has intricate business logic, user accounts, payment systems, and a ton of data to move over, you're naturally looking at the higher end.
Other factors that will move the needle on price include:
- Who You Hire: Are you working with a freelancer, a small agency, or a dedicated dev shop? They all have very different cost structures.
- Your New Tech Stack: The technologies you choose can affect development speed and the pool of available talent.
- The Data Lift: Moving a few hundred user profiles is one thing. Migrating thousands of records with complex relationships and transaction histories is a much heavier lift that requires a lot more planning and testing.
The only way to get a solid number is to draft a detailed scope document. Lay out your core features and how your data is structured. With that in hand, any potential partner can give you a quote you can actually count on.
How Long is This Whole Process Going to Take?
Time is everything for a startup. While every project has its own quirks, a properly planned migration from a no-code MVP to a production-ready application usually takes about six to twelve weeks. That timeline covers everything—from initial planning and mapping out your database to the actual development, testing, and go-live.
I know that might sound like a long time compared to how quickly you built the no-code version. But you have to remember what's being built here. We're not just re-skinning the front end. We're engineering a backend that can actually scale, setting up a secure database, and creating a professional deployment pipeline.
A realistic schedule usually breaks down something like this:
- Weeks 1-2: A deep dive into discovery, mapping out your database schema, and detailed project planning.
- Weeks 3-8: The core development sprints where the features get built, usually with weekly demos to show progress.
- Weeks 9-10: Hitting the code hard with testing, validating the data migration, and squashing bugs.
- Weeks 11-12: The final deployment, close monitoring, and official handover.
This structured approach is what ensures you get a robust, reliable product at the end—not just a fragile copy of your old system. It's about building a foundation that will support your growth for the next several years.
Do I Need to Hire a Full-Time CTO for This?
Not at this stage, and you probably shouldn't. Hiring a full-time, experienced CTO is a massive commitment, both financially and for your company's culture. For the specific, project-based task of migrating off a no-code platform, you have much better, more flexible options.
Think about bringing on a fractional CTO or a specialized agency. These partners give you the senior technical leadership and execution power you need to get the project done right, but without the long-term overhead of an executive salary. It’s the perfect model for getting access to top-tier talent for the exact duration of the project, ensuring your new tech stack is built on a rock-solid foundation.
Once your new, scalable platform is live and stable, you'll be in a much stronger position to attract and hire the right full-time technical leader to help you scale the team and the product.
Ready to move beyond the limits of no-code and build a scalable, defensible asset for your business? First Radicle specializes in turning fragile MVPs into production-grade software in just six weeks, guaranteed. Learn more about our process and how we can help you scale.