A Founder's Guide to Integration With Stripe

Your no-code solution got you to product-market fit. That’s a huge win. But now, you’re likely feeling the growing pains. Soaring Zapier bills, automations that feel like they're held together with tape, and restrictive plugins on platforms like Bubble or Webflow aren't just minor headaches anymore—they're actively getting in the way of your growth.
This is that pivotal moment. Moving to a direct integration with Stripe isn't just a nice-to-have upgrade; it's a necessary step for survival and scale.
When Your No-Code MVP Hits a Wall
The day your no-code setup starts to buckle is both a crisis and a major milestone. It means you’ve successfully proven your concept. You've validated your idea with incredible tools that got you off the ground, but those same tools are now capping your potential. This isn't just a technical snag; it's a business problem with real consequences for your bottom line.
You can see the limitations pop up in a few painful ways. Your operational costs are probably climbing as you stitch together a complex web of third-party services just to keep things running. Every new feature demands another clever workaround, making your system more fragile and a nightmare to maintain. And that traffic spike you've been dreaming of? It could be the very thing that brings the whole system crashing down.
Beyond Technical Debt: The Business Case for Migration
Migrating to a production-grade stack with a direct Stripe integration is about building a real, defensible asset for your company. It solves core business problems that no-code platforms, by their very nature, were never designed to handle at scale.
Here’s a look at what you really gain:
- Ownable Intellectual Property: Let's be frank: investors get nervous about businesses built entirely on rented platforms. When you own your codebase, you own your IP. That’s a critical asset for fundraising and your company's valuation.
- Scalability and Reliability: A custom backend is engineered to handle a viral moment without even breaking a sweat. A direct Stripe integration is built for this, capable of processing huge transaction volumes with rock-solid uptime.
- Enhanced Security: As you grow, moving sensitive customer and payment data off a patchwork of third-party tools and into a secure, controlled environment is non-negotiable. A proper integration with Stripe makes PCI compliance much simpler by keeping raw card data off your servers from the start.
- Ultimate Flexibility: You get total control. Your payment flows, the user experience, and your core business logic are all yours to command. You're no longer stuck working within the narrow constraints of someone else's plugin.
The transition from a no-code MVP to a scalable platform is a defining moment for any startup. It's the point where you trade rapid, constrained iteration for the robust foundation required for explosive, long-term growth.
The sheer power of this approach is mirrored in Stripe's own numbers. The platform has been the engine for countless startups, processing an incredible $1.4 trillion in total payment volume in 2024. During the 2025 Black Friday to Cyber Monday rush alone, businesses on Stripe handled over $40 billion, peaking at 152,000 transactions per minute—all with 99.9999% API uptime while simultaneously blocking millions in fraud.
Ultimately, this isn't just about swapping out a payment processor. It’s about maturing your fragile MVP into a robust business that’s ready for its next funding round and its next million users. For a deeper dive, check out our guide on choosing a no-code web app builder and knowing when it's time to move on.
Choosing Your Stripe Integration Path
Integrating with Stripe isn't a one-size-fits-all decision. The best path for you really depends on your business model. Are you running a simple online store, a SaaS with nuanced subscription tiers, or a complex marketplace with multiple vendors? Nailing this choice upfront is a balancing act between the development effort you can afford today and the flexibility you'll need tomorrow.
This decision fundamentally dictates how much control you have over the user's checkout experience and, frankly, how fast you can start making money. Let's dig into the main options.
Comparing Stripe Integration Methods
To help you see the trade-offs at a glance, here’s a quick breakdown of the three main ways to integrate Stripe. This table should give you a solid starting point for figuring out which method aligns best with your product's current needs and future ambitions.
| Integration Method | Best For | Implementation Effort | Customization Level | PCI Compliance |
|---|---|---|---|---|
| Stripe Checkout | Startups, e-commerce stores, and anyone prioritizing speed-to-market and simplicity. | Low | Low (Logo and brand colors) | Handled by Stripe (SAQ A) |
| Payment Links | One-off sales, simple invoices, donations, and non-technical users who need to generate payment pages quickly. | None (Dashboard-based) | Minimal (Basic branding) | Handled by Stripe (SAQ A) |
| Stripe Elements | Mature SaaS, marketplaces, and businesses needing a fully branded, custom checkout experience integrated into their app. | High | High (Full UI/UX control) | Simplified (SAQ A-EP) |
Ultimately, moving from a simple link to a fully embedded form is a common part of the scaling journey. Now let's dive into the specifics of each.
The Fastest Route: Stripe Checkout
Think of Stripe Checkout as your ready-made, hosted payment page. It’s the quickest way to get up and running. In most cases, all it takes is a few lines of server-side code to create a payment session and send your customer over to a page that Stripe manages entirely.
This path is a lifesaver for businesses that just need to launch. If you're rolling out a new product and need a secure, reliable payment flow right now, Checkout is your best friend. It comes loaded with features like address auto-completion, top-notch fraud protection, and support for tons of payment methods, all maintained and fine-tuned by Stripe's team.
The trade-off for all that speed? Customization is limited. You can add your logo and tweak the colors to match your brand, but the overall look and feel is unmistakably Stripe. For some, that’s perfect. But if you need a payment flow that feels completely native to your app, you might find it a bit restrictive.
The Middle Ground: Payment Links
For certain scenarios, Payment Links are even more straightforward than Checkout. They let you generate a shareable link that takes customers directly to a Stripe-hosted payment page. The best part? You can create them right from the Stripe Dashboard with zero coding required.
This approach is fantastic for:
- Selling single items: Think digital downloads, event tickets, or one-time consulting gigs.
- Simple invoicing: Just send a link to a client over email or chat.
- Accepting donations: A dead-simple way for non-profits to collect support.
While Payment Links are incredibly easy, they offer the least flexibility. They're built for simple, one-time transactions or very basic subscriptions and just aren't designed for complex business logic or tailored checkout flows.
Full Control With Stripe Elements
When you absolutely need to own the entire look, feel, and function of your payment form, Stripe Elements is the way to go. Elements are individual, pre-built UI components—like fields for the card number, expiration date, and CVC—that you embed directly into your own website.
This approach gives you the perfect blend of control and security. You get a completely custom front-end that seamlessly matches your brand identity, while Stripe securely handles the sensitive payment data in the background using iframes. This drastically reduces your PCI compliance headache, since raw card details never even touch your servers.
Using Stripe Elements is the gold standard for production-grade applications. It’s for when you need a polished, branded user experience that feels native to your product. While it demands more development work, it gives you the power to build sophisticated payment flows and handle custom validation logic.
Making this leap means you'll need a proper backend to orchestrate it all. You can get a better sense of what that involves by reading our thoughts on custom backend development.
This decision often becomes crystal clear when your MVP's initial setup starts holding you back.
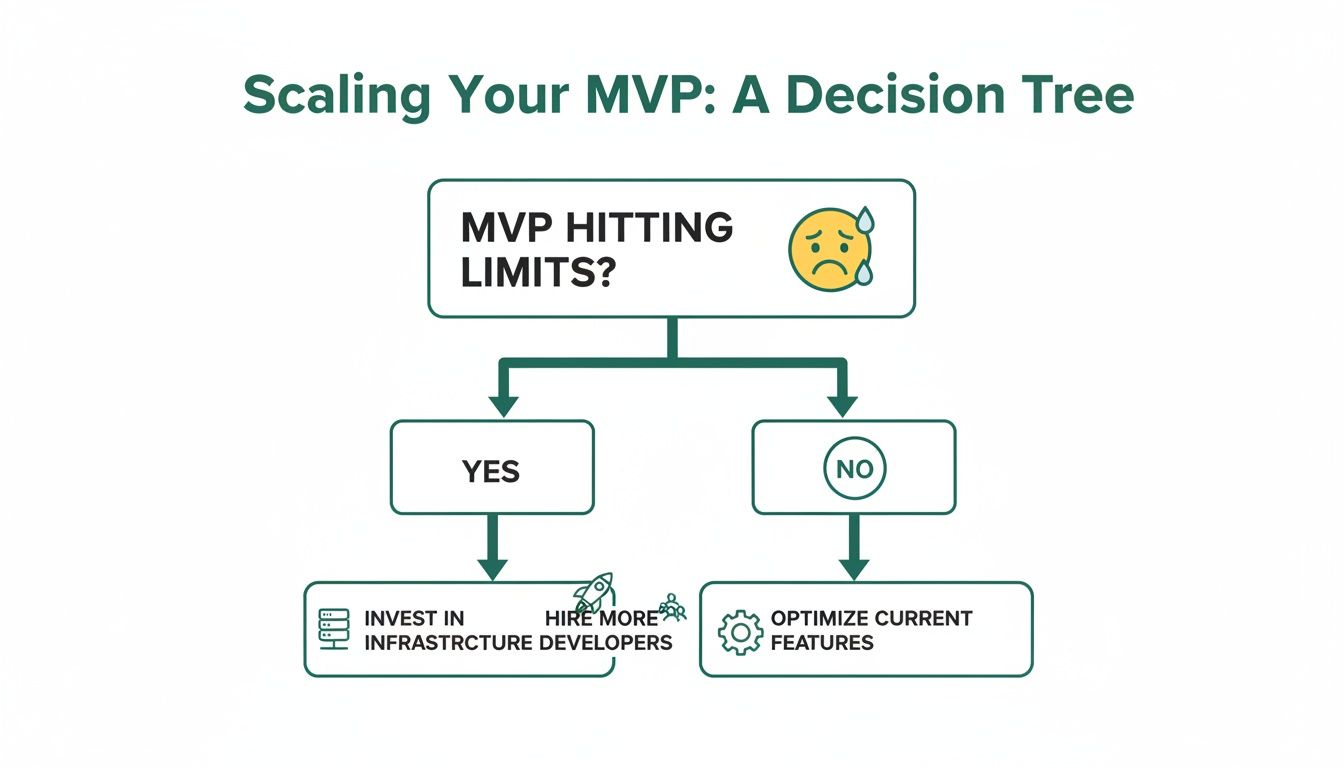
As the flowchart shows, once your MVP starts to creak under pressure, it's time to invest in a scalable, custom solution. Choosing the right Stripe integration method is the first, and most critical, step on that journey to your next phase of growth.
Moving Your Customer and Payment Data
Alright, let's tackle the heart of the migration: moving your customer and payment data. This is where the rubber meets the road. If you get this part right, your users won't notice a thing—except maybe a faster, more reliable service. Mess it up, and you risk damaging the customer relationships you’ve worked so hard to build.
The first step is what’s called schema mapping. Think of it as drawing a blueprint. You're mapping out how your data, currently living in a place like an Airtable base or Bubble's database, will fit into a new, structured home like a PostgreSQL database. This isn't just a technical copy-paste job; it's your opportunity to clean house and set up your data for long-term growth.

From No-Code Fields to a Structured Schema
Your first task is to go field by field, mapping everything from your no-code tool to a column in your new database. For example, a "User" table in Bubble with fields for email, name, and ID becomes a users table in PostgreSQL with columns like email VARCHAR(255) and full_name TEXT.
This is also the perfect moment to start enforcing some data integrity. No-code tools are wonderfully flexible, but that flexibility can sometimes lead to messy, inconsistent data. Now you can define proper data types, set rules like "this field can't be empty," and create clear relationships between tables (like linking a subscriptions table to your users table). A solid database structure is everything, and you can learn more about how to create a database from scratch in our deep-dive guide.
I've seen a few common tripwires here:
- Inconsistent Data Types: An Airtable field might have a mix of text and numbers. You’ll have to clean that up and decide on a single, appropriate data type in your new schema.
- Handling Rich Text: User-generated content from Bubble often comes with markdown or HTML. You need a plan for how you'll store and safely display this in your new app.
- Migrating Passwords: You can't—and shouldn't—export plaintext passwords. The best and most secure approach is to trigger a password reset for all users once the migration is complete.
Securely Migrating Payment Methods with Stripe
Now for the most critical piece: moving payment details without forcing every single customer to pull out their credit card again. Can you imagine the drop-off in retention? It would be brutal. Thankfully, a direct integration with Stripe makes this a smooth, secure, and behind-the-scenes process.
PCI compliance means you can never handle or see raw credit card numbers. Instead, you'll work with Stripe's dedicated data migration team. They securely transfer payment tokens from your old setup to your new Stripe account.
The process is pretty straightforward. First, you'll export all the customer info you can (names, emails, etc.) from your no-code platform. Then, you contact your current payment processor—which might be Stripe itself, just operating through Bubble or Webflow—and ask them to initiate a data transfer to your new, direct Stripe account. Stripe’s team handles the coordination, making sure payment tokens are handed over securely.
This is a huge benefit of building on a solid platform. The right foundation doesn't just help you today; it helps you grow. For instance, businesses often see revenue grow 27 percentage points faster after adopting Stripe Capital financing. And with an API that handles over 500 million requests daily, you know Stripe has the infrastructure to handle your migration and scale with you. You can read more about how Stripe helps businesses grow faster.
The Absolute Necessity of a Dry Run
Before you even think about going live, you must do a full dry run of the entire migration. I can't stress this enough. Set up a staging database and use your Stripe test mode account to run through the whole export, mapping, and import process. You will catch things you'd never see on paper.
Your dry run checklist should confirm a few key things:
- Are all user records transferring correctly?
- Do subscription statuses (active, canceled, past_due) map over perfectly?
- Are the customer IDs in your new database correctly linked to the migrated Stripe Customer objects?
Think of it as a dress rehearsal. It gives you the confidence that when the curtain goes up, everything will work flawlessly. A smooth data migration is that last, vital step away from the constraints of no-code and toward a scalable, professional-grade future.
Building a Resilient Server-Side Payment System
Alright, with your data mapping complete, it's time to roll up our sleeves and build the engine that will actually handle the money. This is where we get into the server-side code that forms the backbone of a solid integration with Stripe. Your backend needs to be the central command center—the ultimate source of truth for creating payments, managing subscriptions, and making sure every single dollar is accounted for.
Never, ever trust the client's browser to have the final say. A user’s Wi-Fi can drop, a browser tab can crash, or a phone battery can die at the worst possible moment. If your entire system hinges on a little "success" message from the frontend, you're practically asking for lost orders and frustrated customers. A server-driven approach is your shield against that kind of chaos.

Core Server-Side Patterns
At its core, a server-side payment flow is surprisingly straightforward. The first time a user signs up, your server should create a Customer object in Stripe. You’ll get a Stripe Customer ID back (e.g., cus_...), which you need to save in your own database, linking your user record to their Stripe profile. This is crucial for things like subscriptions and saved cards.
Then, when it’s time to pay, your server steps in again to create a PaymentIntent. Think of this as a Stripe-managed session for a single transaction. It tracks everything from start to finish. Your server creates the PaymentIntent with the final amount and currency, then passes a unique client_secret down to the frontend. Your UI uses this secret with Stripe Elements to collect card details and confirm the payment, all without your server ever touching sensitive card data.
For instance, here’s what creating a PaymentIntent might look like in a Next.js API route:
// pages/api/create-payment-intent.js import Stripe from 'stripe'; const stripe = new Stripe(process.env.STRIPE_SECRET_KEY);
export default async function handler(req, res) { const { items, customerId } = req.body; // ALWAYS calculate the final amount on the server const amount = calculateOrderAmount(items);
const paymentIntent = await stripe.paymentIntents.create({ amount: amount, currency: 'usd', customer: customerId, // Link to an existing Stripe customer automatic_payment_methods: { enabled: true }, });
// Send only the client secret to the frontend res.send({ clientSecret: paymentIntent.client_secret, }); }
This simple pattern is incredibly powerful. It means your server—not the client—is in full control of the price, preventing anyone from tinkering with the amount in their browser's dev tools.
Webhooks: Your Non-Negotiable Safety Net
If the PaymentIntent is the engine, webhooks are the dashboard warning lights. They are automated notifications Stripe sends to your server to tell you about important events, and they are your absolute safety net. A webhook is how you reliably confirm a payment succeeded, handle a subscription renewal, or react to a failed charge.
Relying only on the frontend callback after a payment is one of the single biggest mistakes I see developers make. It’s a recipe for disaster.
Your webhook handler is the most critical piece of your entire payment integration. It’s the only guaranteed way to know when events like
payment_intent.succeededorinvoice.payment_failedactually happen. Without it, you are flying blind.
When a payment goes through, Stripe fires off a payment_intent.succeeded event to your webhook endpoint. Your server catches it, verifies it's legit, and then does the important work: granting access to a course, triggering an order shipment, or flipping a has_paid flag in your database.
Building a Bulletproof Webhook Handler
A real-world webhook handler needs to be rock-solid. It’s not just another API endpoint; it has to be secure, resilient to failure, and idempotent.
Here’s what every production-ready handler needs:
- Signature Verification: Stripe includes a special cryptographic signature in the headers of every webhook request. Your handler must check this signature against your webhook signing secret. This is how you prove the request is genuinely from Stripe and not from a malicious actor. No exceptions.
- Idempotency: Networks aren't perfect. Sometimes Stripe might send the same event twice. Your system needs to handle this gracefully without, say, charging a customer or shipping an order twice. A common pattern is to log the ID of every event you process and simply return a "success" message if you ever see the same ID again.
- Asynchronous Processing: Don't try to do heavy lifting (like calling multiple external APIs or sending complex emails) the moment you receive a webhook. Immediately send a
200 OKresponse back to Stripe to let them know you got it. Then, pass the real work off to a background job queue like BullMQ or Celery. This prevents timeouts and makes your entire system far more reliable.
Here is a simplified Python example using Flask to show the basic structure, focusing on the essential signature check.
app.py
from flask import Flask, request, jsonify import stripe
app = Flask(name)
Your webhook signing secret (get this from the Stripe Dashboard)
endpoint_secret = 'whsec_...'
@app.route('/webhook', methods=['POST']) def webhook(): payload = request.data sig_header = request.headers.get('stripe-signature') event = None
try:
    # The crucial verification step
    event = stripe.Webhook.construct_event(
        payload, sig_header, endpoint_secret
    )
except ValueError as e:
    # Invalid payload
    return jsonify(status='invalid payload'), 400
except stripe.error.SignatureVerificationError as e:
    # Invalid signature - potential security issue!
    return jsonify(status='invalid signature'), 400

# Now, handle the event you've verified
if event['type'] == 'payment_intent.succeeded':
    payment_intent = event['data']['object']
    # Time to fulfill the purchase!
    handle_successful_payment(payment_intent)

# ... handle other event types as needed

return jsonify(status='success')
By putting these server-side patterns and a tough webhook handler in place, you’ll transform a fragile payment process into a professional, scalable system ready to support your business as it grows.
Your Go-Live Security and Testing Checklist
When a customer gives you their payment details, they’re giving you their trust. This final stretch before launch isn’t just about flipping a switch; it’s about making sure your entire system is buttoned up and ready to honor that trust. Let's get it right.
There’s a reason why Stripe powers 17.33% of the global payment processing market. It's not just about the slick API, which boasts an incredible 99.9999% uptime, or its fraud prevention that knocked down 24.6 million bogus transactions during the 2024 Black Friday/Cyber Monday rush. It's about providing a reliable foundation. You can read more on these Stripe statistics and their business impact. Your job now is to make sure your integration is solid enough to build upon it.
PCI Compliance Isn't as Scary as It Sounds
The term "PCI compliance" often makes developers nervous, but it really doesn't need to. The Payment Card Industry Data Security Standard (PCI DSS) is just a set of rules to keep cardholder data safe.
If you've built your integration using Stripe Elements or Checkout, you've already sidestepped the most complex requirements. These tools are designed so that sensitive card data travels directly from your customer's browser to Stripe's ultra-secure servers, never once touching your own. This simple, elegant design reduces your compliance burden from a potential nightmare to filling out a yearly form called a Self-Assessment Questionnaire (SAQ A). It’s basically your way of formally stating that you're smart enough not to handle raw card numbers yourself.
A Battle-Tested Approach to Testing
Before a single real dollar moves through your system, you need to throw everything you can at your integration. This is where Stripe's test mode becomes your command center—a perfect sandbox for simulating every possible outcome without any real-world consequences.
A solid testing plan goes far beyond just making sure a payment goes through. You need to be thorough.
- Happy Paths: Run successful transactions using Stripe's test card numbers for all the major brands you plan to accept (Visa, Mastercard, Amex, etc.).
- Declined Cards: See what happens when a card is declined. Is the error message your user sees actually helpful? How easy is it for them to grab another card and try again?
- Authentication Challenges: Intentionally trigger 3D Secure and other Strong Customer Authentication (SCA) prompts. Does your UI gracefully handle the redirect or the modal that pops up?
- Post-Payment Flows: Process both a full and a partial refund. Simulate a dispute to ensure your system flags it and alerts the right people on your team.
Don’t just test the transaction; test the entire business process it triggers. A successful charge is just the start. Does the customer get their download link instantly? Is the order sent to the fulfillment center? Test the whole domino effect.
Don't forget to use the webhook simulator in your Stripe developer dashboard. It’s the only reliable way to fire off test events like payment_intent.succeeded or customer.subscription.deleted to confirm your webhook handler behaves exactly as you expect.
The Final Pre-Flight Checklist
You've built it. You've tested it. Now, it's time for one final pass to catch any common go-live blunders. Treat this as your last line of defense.
- Swap in Your Live API Keys: This sounds obvious, but it’s the most common mistake. Go into your environment variables and make absolutely sure you've replaced
sk_test_...andpk_test_...with theirsk_live_...andpk_live_...counterparts. - Lock in Your Webhook Endpoint: Confirm that your production webhook endpoint URL is set up in the Stripe Dashboard and, just as importantly, that your server is using the live webhook signing secret, not the test one.
- Turn on Logging and Monitoring: You need visibility from the moment you go live. Set up monitoring to track API error rates and the health of your webhook handler. If things go wrong, you want to be the first to know.
- Map Out Your Cutover: How are you actually going to make the switch? Will it be a "big bang" cutover late at night? Or will you run the old and new systems in parallel for a bit? Whatever you decide, make sure the entire team knows the plan.
Common Questions About Moving Off No-Code Payments
Making the leap from a no-code MVP to a custom stack always kicks up a lot of questions. It's understandable—you're touching the most critical part of your business: how you get paid and handle customer data. Let's tackle the most common concerns founders have during this shift.
Can I Keep My Existing Customers' Payment Details When I Migrate From Bubble?
Yes, absolutely. This is one of the most critical parts of pulling off a smooth transition.
Because of strict PCI compliance rules, you can't just export a list of raw credit card numbers. Instead, you'll work directly with Stripe's dedicated data migration team to handle the transfer securely behind the scenes. They coordinate the whole thing, moving payment method tokens from your old setup (which is usually Stripe anyway, just via a Bubble or Webflow plugin) to your new, direct integration.
This is a massive win for customer retention. It means your subscribers and returning customers won't have to pull out their wallets again, preventing the huge drop-off in revenue you'd see if everyone had to re-enter their card details.
How Much Harder Is a Custom Stripe Integration Than a No-Code Plugin?
It’s definitely more complex, but that complexity buys you nearly infinite control. A no-code plugin is essentially a "black box"—it's convenient, but you're stuck with its limitations. It works great, right up until the moment it doesn't fit your exact business need.
A custom integration is real backend development. You'll need an engineer to write server-side code (using something like Python or a framework like Next.js) to manage payment intents, create customer objects, and listen for webhooks straight from the Stripe API.
While it's more work upfront, the payoff is enormous. You get total control over the checkout experience, you can build sophisticated logic like metered or usage-based billing, and you can finally replace those brittle third-party automations with robust, testable code that you actually own.
The single biggest mistake is underestimating the importance of a resilient webhook handler. Relying only on a client-side "success" message is a recipe for lost orders. A customer's browser can close or their network can fail after a payment is approved but before your app is notified. Without a server-side webhook listener to receive the
payment_intent.succeededevent directly from Stripe, you will eventually fail to fulfill an order for a paying customer.
Building and verifying your webhooks properly isn't just a feature; it's the absolute cornerstone of a reliable payment system.
What Is the Biggest Mistake to Avoid During This Migration?
The most common—and most damaging—mistake is failing to build that bulletproof webhook handler we just talked about. It’s so easy to get caught up in making the payment form look slick on the frontend, but the real work that ensures you get paid and your customers get what they bought happens on the server.
A client-side confirmation is not a guarantee of payment.
Think of it this way: the frontend tells you the customer thinks they paid. The webhook from Stripe's servers is the official, binding confirmation that money has actually moved.
Your entire system needs to be built around the webhook as the ultimate source of truth for anything payment-related. This includes:
- Successful payments: Kicking off order fulfillment or granting access to a service.
- Failed payments: Alerting the customer and updating their subscription status.
- Subscription renewals: Making sure your recurring revenue flows in correctly.
- Disputes and refunds: Logging these events properly for your finance team.
Skipping this part isn't just a technical shortcut; it's a direct threat to your revenue and your customers' trust.
Do I Need to Be PCI Compliant With a Custom Stripe Setup?
Yes, but Stripe makes this way easier than it sounds. Your PCI compliance burden is dramatically reduced as long as you use tools like Stripe Elements or Stripe Checkout correctly.
These tools are specifically designed so that sensitive cardholder data—the card number, expiration date, and CVC—is sent directly from your customer's browser to Stripe's ultra-secure servers. That information never even touches your application's backend.
Because you aren't handling or storing raw card data, your compliance scope shrinks from a mountain to a molehill. For most businesses using this method, your main responsibility is to complete an annual Self-Assessment Questionnaire (SAQ A). This is basically a straightforward form, and it's infinitely less painful than the expensive audits required for companies that handle card data directly. This is one of the most significant security and operational perks of a proper integration with Stripe.
Feeling overwhelmed by the jump from no-code to a production-grade stack? First Radicle specializes in turning fragile MVPs into scalable, ownable software in just six weeks. We handle the entire migration, from data mapping to building a resilient backend, so you can focus on growing your business. Learn more about our fixed-scope, guaranteed process.