A Founder's Guide to the Subscription API Stripe

If you launched your MVP with a simple Stripe plugin on a no-code platform, you’ve probably hit a wall. It’s a common growing pain. That shift from a fragile, glued-together system to a robust backend powered by the Stripe Subscription API is a massive step for scaling your startup and truly owning your growth.
Moving Beyond No-Code Subscription Tools
Many great startups get their start on platforms like Bubble or Webflow, using simple plugins and Zapier automations to get payments flowing. It's a fantastic way to validate an idea without writing a line of code. But as your user base grows, the cracks in that setup start to show.
You'll find yourself bogged down by manual billing tasks. The automations become brittle, breaking at the worst possible moments. And trying to implement any kind of custom logic? Forget it. You spend more time maintaining a complex web of third-party tools than actually building your product.
This is the exact moment when moving to the Stripe Subscription API becomes a necessity. It’s about finally shifting from a system you rent to a billing engine you own.
Why Owning Your Payment Logic Is Crucial for Scale
Migrating from a no-code setup to a custom backend integration isn't just a technical upgrade—it’s a core business decision. When you own your payment logic, you gain the control and flexibility needed to support long-term growth. It also shows investors you've built a defensible tech stack.
What do you gain?
- Rock-Solid Reliability: A custom backend can handle heavy loads without depending on third-party connectors that might buckle under pressure.
- Total Customization: You can finally build those unique billing models, custom promotions, or intelligent dunning logic that no-code plugins just can't handle.
- Lower Operational Costs: By ditching layers of expensive integrations and manual workarounds, you directly cut your monthly overhead.
- Real Intellectual Property: You own 100% of the code, a critical asset when you're looking to raise venture capital.
Let's be honest: a cobbled-together payment system screams "risk" to both investors and customers. A clean, purpose-built backend shows your business is built on a solid foundation, ready for whatever comes next.
The power behind this move is undeniable, especially when you consider Stripe's market dominance. In the US alone, Stripe holds 68% of the eCommerce payments market. Globally, 1.5 million live websites trust its infrastructure, including 62% of Fortune 500 companies.

No-Code Plugin vs Custom Stripe API Integration
To make it crystal clear, let's break down the differences. While no-code gets you started, a custom integration is what gets you to scale.
| Feature | No-Code Plugin (e.g., Bubble, Webflow) | Custom Stripe API Integration (e.g., Next.js, Python) |
|---|---|---|
| Customization | Very limited; confined to what the plugin developer offers. | Infinite; build any billing logic, trial, or discount model you can imagine. |
| Scalability & Speed | Can become slow and unreliable under heavy load. Prone to timeouts. | Highly performant and built to handle massive traffic and complex subscription states. |
| Dependency | High. You're dependent on a third-party plugin for updates and fixes. | Low. You control the code and are only dependent on Stripe's core, reliable API. |
| Developer Control | None. You work within a black box. | Full control over the entire payment lifecycle, from checkout to dunning. |
| Data Ownership | Data is often siloed or difficult to access and export. | Complete ownership and direct access to your customer and subscription data via the API. |
| Cost | Cheaper upfront but has hidden costs in monthly fees and limitations. | Higher initial development cost but significantly lower operational costs and higher ROI at scale. |
The takeaway here is that no-code tools are an excellent launchpad. But when your business starts to take off, the limitations can hold you back. A direct API integration unlocks the full power of Stripe, giving you the granular control over recurring billing, invoicing, and revenue optimization that you need to truly grow.
Building Your Foundation in the Stripe Product Catalog
Before you write a single line of subscription code, your journey actually starts in the Stripe Dashboard. This is where you’ll build out your product catalog, which acts as the central source of truth for your entire business model. Get this part right from the beginning, and you'll save yourself a world of headaches and refactoring later on.
Your product catalog isn't just a simple list of things you sell; it's the architectural blueprint for how you make money. Think of a Product as the core thing you offer—say, "Pro Tier Access" or "API Usage." It’s the conceptual item your customer is actually buying.
A Price, on the other hand, is the specific billing model you attach to that Product. A single Product can have many different Prices. For example, your "Pro Tier Access" Product might have a monthly price ($49/month) and a discounted annual price ($499/year). This separation is an incredibly powerful concept that gives you a ton of flexibility.
Differentiating Products from Prices
Truly understanding the distinction between Products and Prices is the key to building a Stripe integration that can scale. It’s what keeps your catalog clean and manageable instead of a tangled mess.
- Products are the 'what': They represent the service or good itself. A product has a name and a description, but it has no monetary value on its own.
- Prices are the 'how much' and 'how often': A price defines the amount, currency, and billing interval (one-time, monthly, yearly, etc.). It’s always linked to a single product.
This structure lets you experiment with your business model without touching the core product definition. You can easily add a new annual plan, introduce a promotional price for a limited time, or test different price points in new markets—all while pointing back to the same underlying Product. For a startup that needs to stay agile, this separation is a lifesaver.
The golden rule here is simple: treat your code as a consumer of your catalog, not its manager. Your code should only ever reference Price IDs. The actual definition of those prices—the amount, the currency, the billing cycle—should live exclusively in the Stripe Dashboard.
Structuring Your Catalog for Future Growth
When you first set up your catalog, try to think three steps ahead. Are you eventually going to offer different tiers? Do you plan to add usage-based components down the road? A little bit of foresight now will prevent major architectural migraines later.
Let's imagine a SaaS app with a "Basic" and "Pro" tier. Instead of just creating two products, think about using metadata. You can use Stripe's metadata fields to add internal identifiers, like tier: 'basic' or feature_set: 'premium'. This data is fully accessible via the API and helps your backend logic make decisions without having to hardcode product names.
Crucially, always use the generated Price ID (it looks something like price_1Lxyz...) in your application's code, never a hardcoded amount like $29. Storing these IDs in an environment variable or a configuration file is the way to go. This approach is central to a clean subscription API Stripe integration because it completely decouples your pricing from your codebase.
Why does this matter so much? Picture this: you need to raise your prices by 10%. With this setup, you just create a new Price in the Stripe Dashboard, update the Price ID in your config file, and deploy. Done. No changes are needed to your core subscription logic. If you had hardcoded the dollar amount, you'd be digging through your codebase, making changes, and running a full, risky deployment. It’s a slower and far more error-prone process. If you want to see how this thinking fits into the bigger picture, check out our guide on custom backend development.
Building Out Your Core Subscription Workflow
Alright, you've mapped out your business logic and set up your product catalog in the Stripe Dashboard. Now for the fun part: bringing it all to life with code. This is where we'll dive into the Stripe Subscription API to create customers, securely capture their payment info, and officially kick off their recurring billing.
This whole process is a sequence of connected API calls. Think of it as a domino effect. First, you need a digital representation of your user inside Stripe's ecosystem. This is done by creating a Customer object—a critical container that will hold all their payment methods, invoices, and active subscriptions.
Don't underestimate this first step. The customer_id you receive back from this API call is the key to everything that follows. Every subscription, every invoice, and every saved payment method will be tied directly to this single ID.
The diagram below illustrates how the products and prices you just created in the catalog form the foundation for the subscription flow we're about to build.
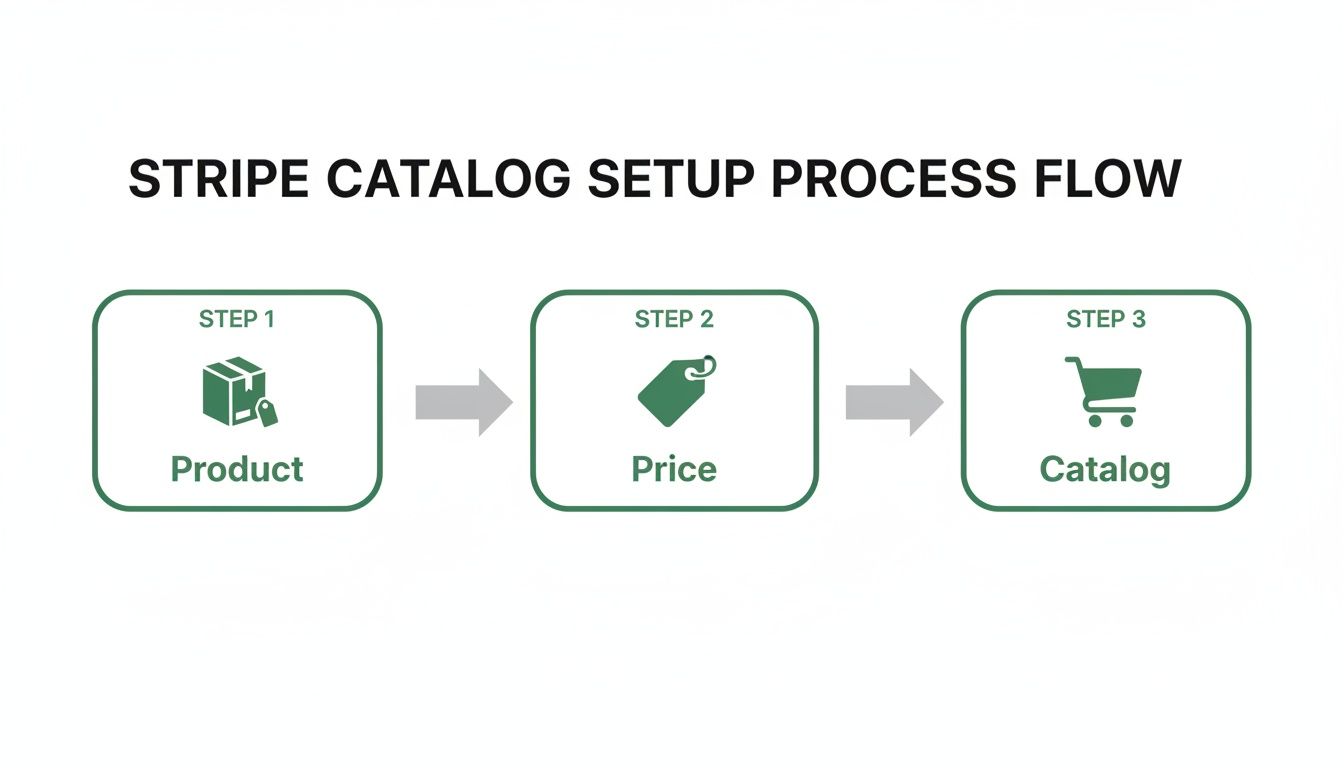
It’s a good visual reminder that Products and Prices are separate concepts, which is what gives you so much flexibility when you start creating and managing subscriptions with the API.
Securely Collecting Payment Details
With a Customer object created, your next challenge is collecting payment details. Let me be clear: you never, ever want to handle raw credit card numbers on your server. Doing so throws you into the deep end of PCI DSS compliance, a world of security audits and liability you want no part of.
Thankfully, Stripe has a brilliant solution for this: Stripe Elements. These are prebuilt, customizable UI components that you embed directly into your checkout page. They create secure iframes that send sensitive card information straight from your user's browser to Stripe's servers, completely bypassing your infrastructure. All your backend ever sees is a safe, non-sensitive token known as a PaymentMethod ID.
This setup is the best of both worlds. You get a checkout experience that feels completely native to your application, while Stripe handles the immense burden of PCI compliance for you. For any production-grade application, using Elements is non-negotiable.
Key Takeaway: Never let raw payment information like a credit card number or CVC touch your server. Using Stripe Elements or Checkout is the only way to ensure your integration is PCI compliant from day one and drastically reduces your security risk.
This is the kind of robust infrastructure that allows Stripe to handle mind-boggling volume. During a recent Black Friday/Cyber Monday shopping weekend, they processed 465 million transactions over just four days, hitting a peak of 137,000 transactions per minute—all while maintaining 99.999% API uptime. These are the kinds of Stripe performance stats that give you confidence when building a mission-critical system.
Creating the Subscription with the API
You now have all the pieces of the puzzle:
- A
customer_idfor your user. - A
payment_method_idfrom Stripe Elements. - The
price_idfor the plan they've chosen.
The final move is a single API call to the subscriptions endpoint to bring it all together. The first thing you'll do is attach the new PaymentMethod to the Customer and set it as their default for all future invoices.
Then, you create the subscription itself by passing in the customer and price IDs. From there, Stripe takes over, automatically generating the first invoice and attempting to charge the customer’s default payment method to activate the subscription.
Here’s a quick look at how this plays out in a Node.js environment:
// Example using Node.js and the Stripe SDK const stripe = require('stripe')('your_secret_key');
// Assume customerId, paymentMethodId, and priceId are passed from your frontend async function createSubscription(customerId, paymentMethodId, priceId) { try { // Attach the payment method to the customer await stripe.paymentMethods.attach(paymentMethodId, { customer: customerId, });
// Set it as the default payment method for the customer
await stripe.customers.update(customerId, {
  invoice_settings: {
    default_payment_method: paymentMethodId,
  },
});

// Create the subscription
const subscription = await stripe.subscriptions.create({
  customer: customerId,
  items: [{ price: priceId }],
  expand: ['latest_invoice.payment_intent'], // Important for SCA
});

return subscription;
} catch (error) { // Handle errors, e.g., card declines console.error('Subscription creation failed:', error); throw error; } }
This snippet nails the core logic. Notice the expand parameter—it’s incredibly important for handling payments from Europe that fall under Strong Customer Authentication (SCA) rules, as it gives you the context you need to handle 3D Secure challenges on the frontend.
Managing Existing Subscriptions
Of course, your work isn't finished once the subscription goes live. Customers expect to manage their billing details, and your application needs to provide a seamless way for them to do that.
Here are the essential management tasks you'll need to support:
- Updating Payment Methods: Let users add a new card and make it their default. The flow is almost identical to the initial setup—you'll use Elements to collect the new card info and then update the Customer object's
invoice_settings.default_payment_method. - Cancelling a Subscription: This is a simple API call. You can cancel it immediately, but a better user experience is usually to cancel at the end of the current billing period. Just set
cancel_at_period_endtotrueon the subscription object. - Retrieving Subscription Details: To power a user's billing dashboard, you'll need to fetch their current plan details, status, and the next billing date. You can get all of this by retrieving the Subscription object using its ID, which you should be storing in your own database.
Managing the Subscription Lifecycle with Webhooks
So, you’ve created a subscription. That’s a huge first step, but the real work starts now. Thinking you can just "fire-and-forget" after a customer signs up is a surefire way to run into trouble down the road. Your app needs to react to things that happen entirely on Stripe's side—a successful monthly renewal, a card that suddenly fails, or a customer dispute.
This is exactly where Stripe Webhooks come into play. Think of them as the central nervous system for your entire billing setup. They're just automated messages that Stripe sends to your application whenever something important happens. They are the only reliable way to keep your system's data perfectly in sync with what’s happening in Stripe, ensuring a user's access level always matches their actual payment status.
Without a solid webhook handler, your database will inevitably drift out of sync with reality. You'll end up with customers who have paid but can't access their features, or worse, users who churned months ago but are still happily using your premium services for free. A production-ready subscription API Stripe integration is built on the back of well-implemented webhooks.

Identifying the Mission-Critical Webhook Events
Stripe can notify you about hundreds of different events, and it's easy to get overwhelmed. The good news? You don't need to listen to all of them. For a subscription business, there are just a handful of events that are absolutely non-negotiable for building a resilient system.
Nailing these core events means you’ve covered the entire customer journey, from successful payments to failed ones and eventual cancellations.
Here are the events you absolutely must handle:
invoice.payment_succeeded: This is your green light. It fires every single time a subscription renewal goes through successfully. When this event hits your server, your code should verify the subscription period and update your database to extend that user's access until the next billing date.invoice.payment_failed: This is your red light. It tells you a renewal payment didn't go through. This is your cue to kick off your dunning process—notify the customer about the issue and perhaps temporarily downgrade their access until they update their payment info.customer.subscription.deleted: This event is the final word. It fires when a subscription is officially canceled, either by the customer directly or because your dunning process failed after multiple retries. Your handler for this event must definitively revoke access in your system. No exceptions.
If you miss any of these three, you're either going to lose money or create a nightmare for your customers. Forgetting to process customer.subscription.deleted events, for example, is a classic mistake that leads to giving your product away for free.
Building a Secure and Idempotent Webhook Handler
Setting up an endpoint in your application to receive these webhooks is simple enough, but you have to build it with security and reliability in mind. Your webhook URL is a public endpoint on the internet, which means you must verify that incoming requests are actually from Stripe and not some bad actor trying to mess with your system.
Thankfully, Stripe makes this easy by including a special signature in the headers of every webhook request. The very first thing your handler should do is verify this signature using your unique webhook signing secret. All the official Stripe SDKs have built-in helpers for this, so there's no excuse for skipping this step.
Pro Tip: Your webhook handler must be idempotent. This is a fancy way of saying that if your endpoint receives the exact same event multiple times (which can and does happen), it won't mess things up. You don't want to grant a user double the access or send them five identical emails. A simple way to achieve this is to store the Stripe event ID and check if you've already processed it before running your logic.
The design of these handlers is a perfect real-world application of system design principles. If you want to dig deeper, it's worth exploring some established software architecture best practices, as they apply just as much to payment systems as any other critical piece of your infrastructure.
Essential Stripe Webhook Events for Subscriptions
To give you a clearer picture, I've put together a quick-reference table that breaks down the most important events, when they fire, and what your application should do in response. This isn't an exhaustive list, but it's the foundation for any solid subscription system.
| Webhook Event | When It Fires | Common Action in Your Application |
|---|---|---|
invoice.payment_succeeded |
A recurring subscription payment is successful. | Update the access_until date in your database. Send a "Thank You" or receipt email. |
invoice.payment_failed |
A recurring payment fails (e.g., expired card). | Send an email asking the customer to update their payment method. Mark the account as "past due." |
customer.subscription.updated |
A subscription is changed (e.g., upgrade/downgrade). | Adjust the user's permissions or feature access in your system to reflect the new plan. |
customer.subscription.deleted |
The subscription is officially canceled. | Immediately revoke access to all paid features. Update the user's status to "canceled." |
customer.subscription.trial_will_end |
A few days before a free trial converts to a paid plan. | Send a reminder email that their card will soon be charged. |
By thoughtfully handling these key events, you're building more than just a payment-taker. You're creating an automated, self-healing billing machine that keeps your business running smoothly without constant manual intervention.
Getting Into the Weeds: Advanced Subscription Scenarios
Once you have the basics down—a solid subscription flow and a webhook handler that doesn’t miss a beat—you can start tackling the real-world stuff. These are the scenarios that separate a simple billing setup from a truly mature, production-ready system. It's these flexible, customer-friendly options that make a real difference to your retention and revenue.
Honestly, these aren't even "edge cases" anymore. Customers now expect to be able to upgrade, downgrade, and get fair billing adjustments without having to think about it. It’s no surprise that Stripe has seen such massive adoption among SaaS companies—a staggering 78% adoption rate—because it’s built to handle precisely these kinds of sophisticated models. You can dig into more data on Stripe's market impact here.
Managing Plan Changes and Prorations
One of the first things you'll run into is a customer wanting to change their plan. Someone on your "Basic" tier wants to jump up to "Pro" for more features, or maybe a "Pro" user decides to scale back. Your system has to handle this transition seamlessly, and that means getting prorations right.
Proration is just a fancy word for charging someone for the time they actually use on different plans within one billing cycle. If a user upgrades mid-month, you don't want to double-charge them. Instead, you give them a credit for the unused time on their old plan and charge them only for the remaining time on the new one.
The good news? Stripe does all the tricky math for you by default. When you update a subscription to a new price through the API, Stripe automatically creates proration line items on the next invoice.
You do have some control over this with the proration_behavior parameter:
create_prorations(the default): This is the one you'll use most often. Stripe calculates the proration and simply adds it to the customer's next scheduled invoice. It's clean and customer-friendly.always_invoice: Stripe immediately creates and tries to charge a new, separate invoice for just the proration amount. This is useful for big upgrades where you want to collect the difference right away.none: This turns proration off completely. You might use this if you want to let a user access new features immediately but only start charging the higher rate on their next billing cycle.
Here's how that plays out: A customer on a $10/month plan upgrades to a $30/month plan exactly halfway through their billing period. Stripe will automatically calculate a $5 credit for the unused "Basic" time and a $15 charge for the "Pro" time. The result is a net charge of just $10 added to their next invoice.
Automating Dunning to Fight Churn
Involuntary churn is the silent killer of subscription businesses. This is when a customer's payment fails not because they want to leave, but because of a simple issue like an expired card, insufficient funds, or a random bank decline. If you don't have an automated way to handle this, you're just letting money walk out the door.
This is where dunning comes in. Stripe's automated collection tools, especially Smart Retries, are your best friends here. Instead of just hammering a failed card every day, Smart Retries uses machine learning—trained on data from billions of transactions—to retry the charge at the exact time it's most likely to succeed. It's incredibly effective.
You can set all this up right in your Stripe Dashboard under Billing > Settings > Subscriptions and emails. You get to define:
- The Retry Schedule: Tell Stripe how many times to retry a failed payment over a certain period (e.g., 4 times over 3 weeks).
- Customer Emails: Turn on and customize automated emails that let customers know their payment failed and give them a link to update their card info.
- The Final Outcome: Decide what happens after all retries fail. Do you mark the subscription as
unpaidor just cancel it outright?
A well-tuned dunning process can easily recover a huge chunk of failed payments, all without your team lifting a finger. It's a direct boost to your bottom line.
Handling SCA and Metered Billing
If you're doing business globally, especially in Europe, you can't ignore Strong Customer Authentication (SCA). It's a legal requirement that adds a layer of two-factor authentication to many online payments to combat fraud.
While it adds an extra step for the user, the Stripe Subscription API is built to handle it. The key is using the expand: ['latest_invoice.payment_intent'] parameter when you create a subscription. This little trick ensures the API response includes everything you need to trigger a 3D Secure authentication flow on your frontend if it's required.
Finally, let's talk about metered or usage-based billing. This model is perfect for API products, infrastructure services, or any tool where customers pay for what they use. To get this going, you set a price's recurring.usage_type to metered.
Throughout the month, your application reports usage to Stripe for a specific subscription item. For example, you might report one unit of usage for every 1,000 API calls a customer makes. At the end of the billing cycle, Stripe totals up all the reported usage and bills the customer for it. It's a powerful model that perfectly aligns the value you provide with the price your customer pays.
Common Questions About the Stripe Subscription API
When you're in the weeds building a subscription system, even with a powerful tool like the Stripe Subscription API, you're bound to run into some specific, tricky scenarios. Let's walk through a few of the most common questions I see founders and developers tackle during an integration.
How Should I Handle Taxes with Subscriptions?
Dealing with sales tax, VAT, and GST is a classic headache, especially when your customer base goes global. The good news is, you don’t have to become an international tax lawyer overnight.
Stripe Tax is built for this exact problem. It’s a dedicated product that automates the whole mess. You can flip it on with a single toggle in your Dashboard or add one line of code when creating a subscription. From there, Stripe uses the customer's address to figure out the right tax amount for each invoice, keeping you compliant no matter where you sell.
What Is the Best Way to Test My Integration?
You absolutely cannot skip thorough testing with a payment system. This is where Stripe's sandbox environment, or test mode, becomes your best friend.
In test mode, you get a completely separate set of API keys. Stripe also gives you a bunch of special test card numbers that let you simulate almost any scenario you can think of:
- Standard successful payments
- Specific card declines, like "insufficient funds" or "expired card"
- Cards that need an extra 3D Secure authentication step for SCA
For your webhooks, the Stripe CLI is indispensable. It lets you securely pipe webhook events from Stripe’s servers directly to your local machine. This means you can debug your entire webhook flow without having to constantly deploy code to a live server. And it should go without saying, but never use real card details in test mode.
A robust testing suite isn’t just about making sure things work; it’s about making sure things don't break in unexpected ways. Simulating failed payments is just as important as simulating successful ones. This builds resilience directly into your system.
Can I Offer Free Trials with the API?
Of course. Free trials are a core part of the Stripe Subscription API, and setting them up is pretty simple. You’ve got two main ways to go about it.
First, you can set a trial period directly on a Price object right in the Stripe Dashboard. The other option is to add it dynamically when you create the subscription via the API—just pass the trial_period_days parameter in your request.
While the trial is active, the subscription is live, but no invoices are generated. A really helpful feature is the customer.subscription.trial_will_end webhook, which Stripe sends automatically three days before the trial is up. It's the perfect trigger for sending a reminder email to your user.
How Do Prorations Work When a User Changes Plans?
This is one of those things that used to be a nightmare to code manually. Thankfully, Stripe handles prorations automatically by default, making plan changes incredibly smooth.
When a customer upgrades or downgrades mid-cycle, Stripe calculates the value of the time they didn't use on the old plan and the cost of the time remaining on the new one. The difference shows up as a proration line item on their next invoice. If you need more control, you can use the proration_behavior parameter to change this. You can choose to bill the customer immediately, wait for the next billing cycle, or even turn off prorations completely for a specific change.
If you're tired of hitting the limits of no-code tools and need to build a scalable, production-grade subscription system, First Radicle can help. We specialize in migrating founders from fragile MVPs to robust tech stacks in just six weeks, guaranteed. Learn more about our process at First Radicle.